专注Java教育14年
全国咨询/投诉热线:400-8080-105
更新时间:2021-09-09 11:39:01 来源:动力节点 浏览1734次

上边的解析内部使用下边的jar进行图片上传。
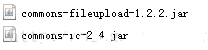
所需jar已传入的资源页名字为springmvc文件上传
在 页面form中提交enctype="multipart/form-data"的数据时,需要springmvc对multipart类型的数据进行解析。所以在servlet.xml中添加解析器(如果表单的类型是multipart,一定要配置这个解析器,否则参数绑定失败,传参失败)。如下:
<bean id="multipartResolver"
		class="org.springframework.web.multipart.commons.CommonsMultipartResolver">
		<!-- 设置传输文件的最大值-->
		<property name="maxUploadSize">
			<value>104857600</value>
		</property>
		<property name="maxInMemorySize">
			<value>4096</value>
		</property>
	</bean>
由于我们有时候保存的图片数量很多或者图片很大,不可能把图片放到数据库中进行存储,所以最好的办法就是放到服务器单独的文件夹中,但是,jsp读取不到tomcat工程以外的文件,所以就需要配置虚拟目录可以使jsp读取到本地的文件,具体配置如下:
假如你想把文件的路径设置为F:\java_code\picture
第一种方法就是双击tomcat server进行配置如图:
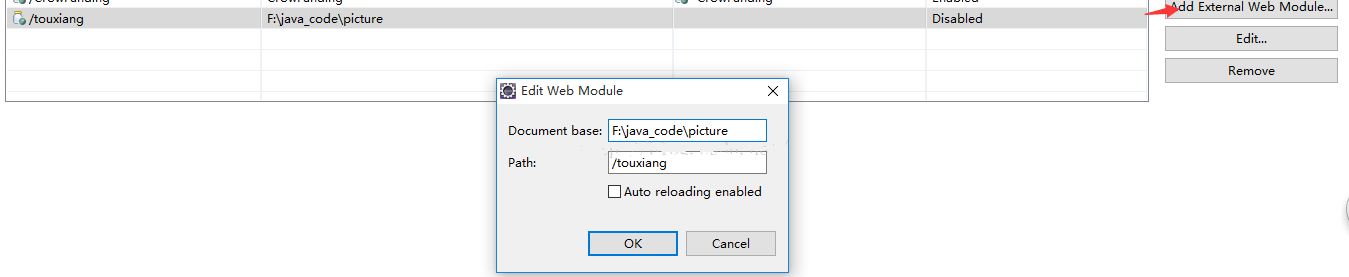
第二种方法:也可以在tomcat的server.xml中进行配置
<span style="color:#ff0000;"><Context docBase="F:\java_code\picture" path="/touxiang" reloadable="false"/></span>
使用的是jquery,这样可以直接显示出上传的图片
<%@ page language="java" contentType="text/html; charset=UTF-8"
    pageEncoding="UTF-8"%>
<%@page isELIgnored="false" %>
<!DOCTYPE html PUBLIC "-//W3C//DTD HTML 4.01 Transitional//EN" "http://www.w3.org/TR/html4/loose.dtd">
<html>
<head>
<%@include file="/jsp/include.jsp"%>
<script type="text/javascript">
function uploadPhoto() {
    var imagePath = $("#image_input").val();
    if (imagePath == "") {
        alert("please upload image file");
        return false;
    }
    var strExtension = imagePath.substr(imagePath.lastIndexOf('.') + 1);
    if (strExtension != 'jpg' && strExtension != 'gif'
            && strExtension != 'png' && strExtension != 'bmp') {
        alert("please upload file that is a image");
        return false;
    }
    $("#formPhoto").ajaxSubmit({
        type : 'POST',
        url : 'uploadPhoto.do',
        success : function(data) {
            alert("上传成功");
            $("#imgDiv").empty();
            <span style="color:#ff0000;">$("#imgDiv").html('<img src="/touxiang/'+data+'"/>');//</span><span style="color:#000099;">配置的虚拟路径加上文件名直接显示在div中</span>
            $("#imgDiv").show();
        },
        error : function() {
            alert("上传失败,请检查网络后重试");
        }
    });
}
</script>
</head>
<body>
	<table>
		<tr>
			<td colspan="2">
				<form id="formPhoto" enctype="multipart/form-data">
					<table>
						<tr>
							<td>选择文件:<input type="file" name="file" id="image_input"></td>
							<td><input type="button" value="上传" id="upLoadImg" οnclick="uploadPhoto()"></td>
						</tr>
					</table>
				</form>
			</td>
		</tr>
		<tr>
			<td colspan="2">
				<div id="imgDiv"></div>
			</td>
		</tr>
	</table>
</body>
</html>
返回到前台一个本地的路径,注意因为我们已经配置好了虚拟路径只需要把图片的名字返回到前台即可
 @RequestMapping("uploadPhoto")
    @ResponseBody
    public String uploadImage(HttpServletRequest request,
            HttpServletResponse response, HttpSession session,
            @RequestParam(value = "file", required = true) MultipartFile file)
            throws IllegalStateException, IOException {
        //String path = session.getServletContext().getRealPath("/upload");
        String pic_path = "F:\\java_code\\picture\\";
        System.out.println("real path: " + pic_path);
        String fileName = file.getOriginalFilename();
        System.out.println("file name: " + fileName);
        File targetFile = new File(pic_path, fileName);
        if (!targetFile.exists()) {
            targetFile.mkdirs();
        }
        file.transferTo(targetFile);
        String fileUrl = fileName;
        return fileUrl;
    }
至此图片上传到本地就已经完成了。
以上就是动力节点小编介绍的"SpringMVC图片上传保存到本地并立即显示",希望对大家有帮助,想了解更多可查看SpringMVC教程。动力节点在线学习教程,针对没有任何Java基础的读者学习,让你从入门到精通,主要介绍了一些Java基础的核心知识,让同学们更好更方便的学习和了解Java编程,感兴趣的同学可以关注一下。
 Java实验班
0基础 0学费 15天面授
 Java就业班
有基础 直达就业
 Java夜校直播班
业余时间 高薪转行
 Java在职加薪班
工作1~3年,加薪神器
 Java架构师班
工作3~5年,晋升架构
提交申请后,顾问老师会电话与您沟通安排学习

官方微信

官方抖音


 京公网安备 11030102010736号