JMS&ActiveMQ教程
基于JMS的消息传送
- Java消息队列:JMS消息结构
- Java消息服务(JMS)API
- ActiveMQ发送消息与接收消息示例
- ActiveMQ发布与订阅示例
- ActiveMQ事务消息和非事务消息
- ActiveMQ中Queue与Topic的区别
- ActiveMQ中拉模式与推模式
- ActiveMQ消息类型
- ActiveMQ消息确认机制
- ActiveMQ持久化消息与非持久化消息
- ActiveMQ消息过滤
- ActiveMQ接收消息
ActiveMQ与Spring集成
ActiveMQ与SpringBoot集成
ActiveMQ安全机制
ActiveMQ主从集群
ActiveMQ发送消息与接收消息示例

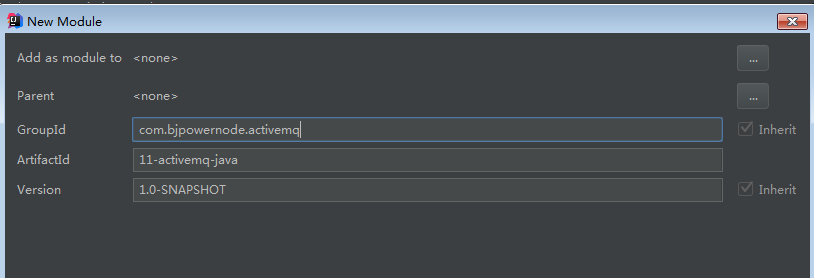
1、创建普通的maven项目11-activemq-java
2、在pom.xml文件中加入jms 和 activemq 的相关依赖
<!-- JMS规范的jar依赖 -->
<dependency>
    <groupId>javax.jms</groupId>
    <artifactId>javax.jms-api</artifactId>
    <version>2.0.1</version>
</dependency>

<!-- activeMQ对jms具体实现的jar依赖 -->
<dependency>
    <groupId>org.apache.activemq</groupId>
    <artifactId>activemq-client</artifactId>
    <version>5.15.8</version>
</dependency>
3、在com.bjpowernode.activemq.send包下编写一个消费发送者QueueSender发送消息
package com.bjpowernode.activemq.send;
import org.apache.activemq.ActiveMQConnectionFactory;
import javax.jms.*;
public class QueueSender {
    public static final String BROKER_URL = "tcp://192.168.235.128:61616";
//相当于一个数据库(其实是一个队列)
    public static final String DESTINATION = "myQueue";
    public static void main(String[] args) {
        sendMessage();
    }
    public static void sendMessage(){
        //1 .创建一个连接工厂
        ConnectionFactory connectionFactory = new ActiveMQConnectionFactory(BROKER_URL);
        Connection connection = null;
        Session session = null;
        MessageProducer messageProducer = null;
        try {
            //2. 获取一个连接
            connection = connectionFactory.createConnection();
            //3. 创建一个Session 第一个参数:是否是事务消息 第二个参数:消息确认机制(自动确认还是手动确认)
            session = connection.createSession(Boolean.FALSE, Session.AUTO_ACKNOWLEDGE);
            //4. 有了session之后,就可以创建消息,目的地,生产者和消费者
            Message message = session.createTextMessage("Hello ActiveMQ");
            //目的地
            Destination destination = session.createQueue(DESTINATION);
            //生产者
            messageProducer = session.createProducer(destination);
            //发消息 没有返回值,是非阻塞的
            messageProducer.send(message);
        } catch (JMSException e) {
            e.printStackTrace();
        }finally{
            try {
                if(messageProducer != null){
                    messageProducer.close();
                }
                if(session != null){
                    session.close();
                }
                if(connection != null){
                    connection.close();
                }
            }catch (JMSException e) {
                e.printStackTrace();
            }
        }
    }
}
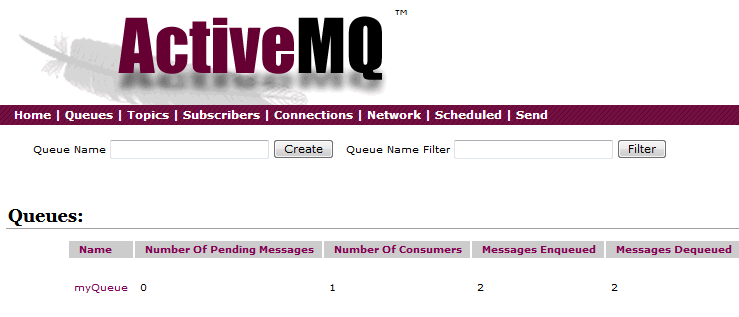
4、运行程序,连接ActiveMQ的web控制台查看


5、启动提示sl4j日志没有实现,在pom.xml文件中添加slf4j-simple 1.7.25,或者slf4j-nop 1.7.25

<!--slf4j的简单实现-->
<dependency>
    <groupId>org.slf4j</groupId>
    <artifactId>slf4j-simple</artifactId>
    <version>1.7.25</version>
</dependency>
6、在com.bjpowernode.activemq.receive包下编写一个消费接收QueueReceiver接收消息
package com.bjpowernode.activemq.receive;
import org.apache.activemq.ActiveMQConnectionFactory;
import javax.jms.*;
public class QueueReceiver {
    public static final String BROKER_URL = "tcp://192.168.235.128:61616";
    //相当于一个数据库(其实是一个队列)
    public static final String DESTINATION = "myQueue";

    public static void main(String[] args) {
        receiveMessage();
    }
    public static void receiveMessage(){
        //1 .创建一个连接工厂
        ConnectionFactory connectionFactory = new ActiveMQConnectionFactory(BROKER_URL);
        Connection connection = null;
        Session session = null;
        MessageConsumer messageConsumer = null;
        try {
            //2. 获取一个连接
            connection = connectionFactory.createConnection();
            //接收消息,需要将连接启动一下,才可以接收到消息
            connection.start();
            //3. 创建一个Session 第一个参数:是否是事务消息 第二个参数:消息确认机制(自动确认还是手动确认)
            session = connection.createSession(Boolean.FALSE, Session.AUTO_ACKNOWLEDGE);
            //4. 有了session之后,就可以创建消息,目的地,生产者和消费者
            //目的地
            Destination destination = session.createQueue(DESTINATION);
            //消费者
            messageConsumer = session.createConsumer(destination);
            //循环接收消息
            while (true){
                //接收消息 有返回值,是阻塞的
                Message message = messageConsumer.receive();
                //判断消息类型
                if(message instanceof TextMessage){
                    String text = ((TextMessage) message).getText();
                    System.out.println(text);
                }
            }
        } catch (JMSException e) {
            e.printStackTrace();
        }finally{
            try {
                if(messageConsumer != null){
                    messageConsumer.close();
                }
                if(session != null){
                    session.close();
                }
                if(connection != null){
                    connection.close();
                }
            }catch (JMSException e) {
                e.printStackTrace();
            }
        }
    }
}
注意:接收方要调用connection的start方法才能接收到
7、运行接收者的代码,在ActiveMQ的web控制台观察消息数据