- SpringBoot集成MyBatis
- SpringBoot事务管理
- SpringBoot中SpringMVC注解
- SpringBoot实现RESTful
- SpringBoot集成Redis
- SpringBoot集成Dubbo
- SpringBoot热部署插件
- SpringBoot集成Thymeleaf
- SpringBoot Thymeleaf表达式
- SpringBoot Thymeleaf常见属性
- Thymeleaf字面量、字符串拼接及运算符
- Thymaleaf表达式基本对象与功能对象
SpringBoot集成MyBatis

项目名称:010-springboot-web-mybatis
案例思路
通过SpringBoot +MyBatis实现对数据库学生表的查询操作;
数据库参考:springboot.sql脚本文件。
实现步骤
1.准备数据库
启动Linux系统上的mySQL服务器,通过Navicat连接

创建新的数据库springboot,指定数据库字符编码为utf-8
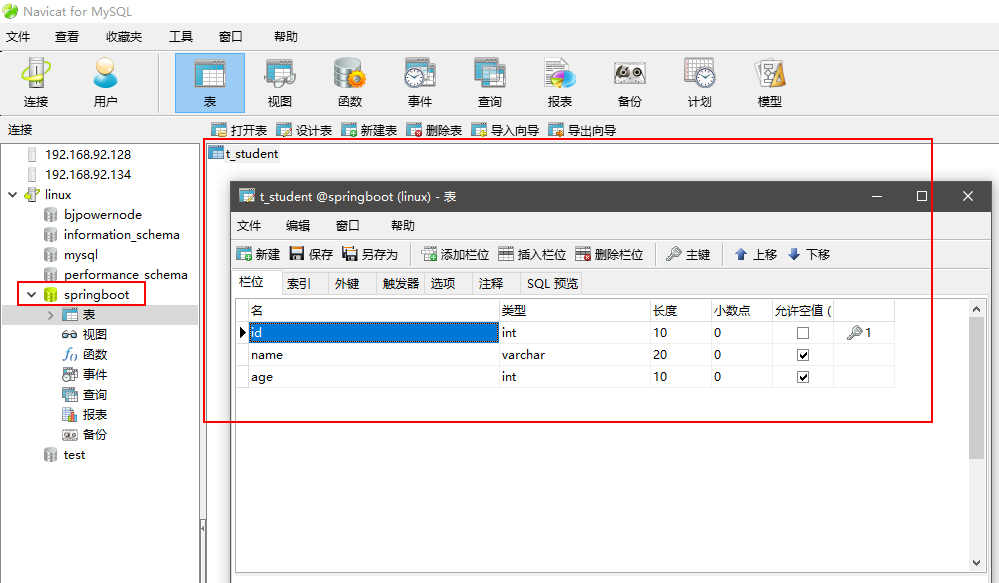
向表中插入数据

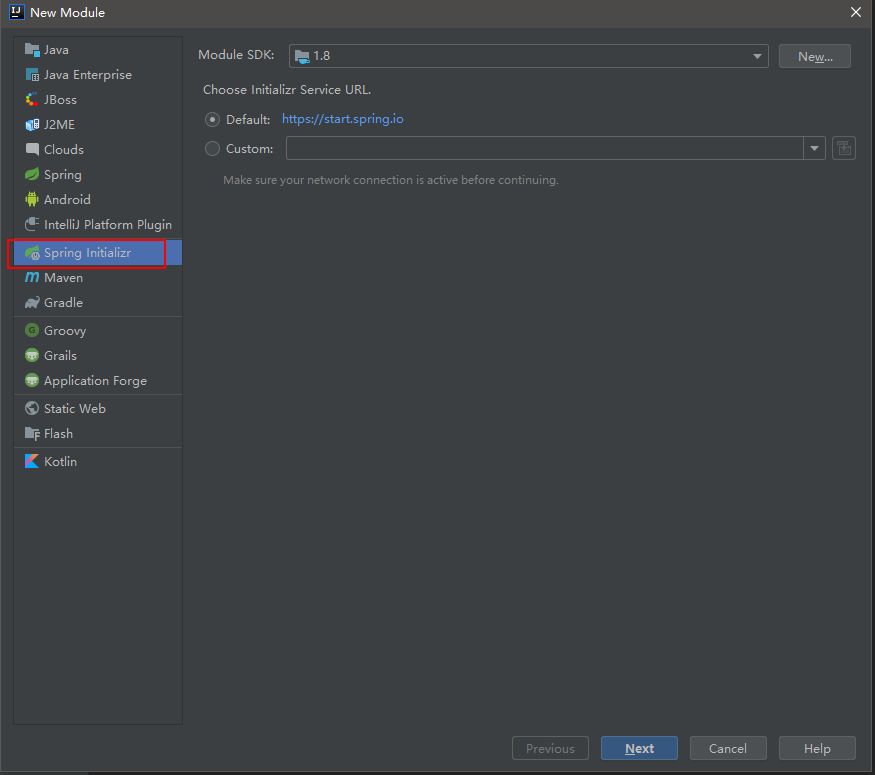
2.创建010-springboot-web-mybatis项目
创建一个新的SpringBoot的Module
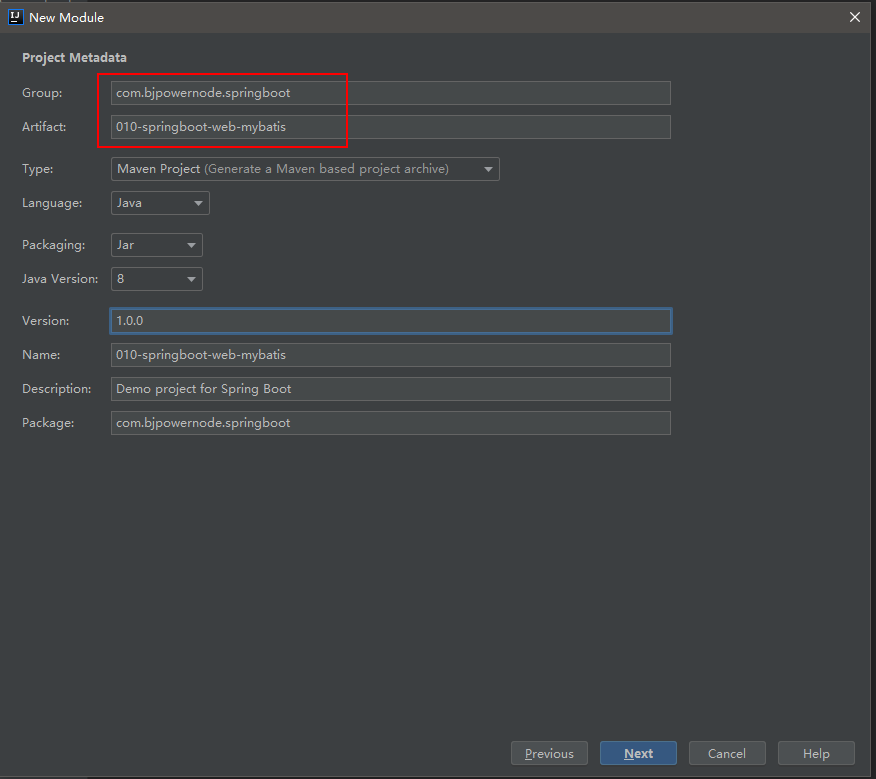
指定GAV坐标
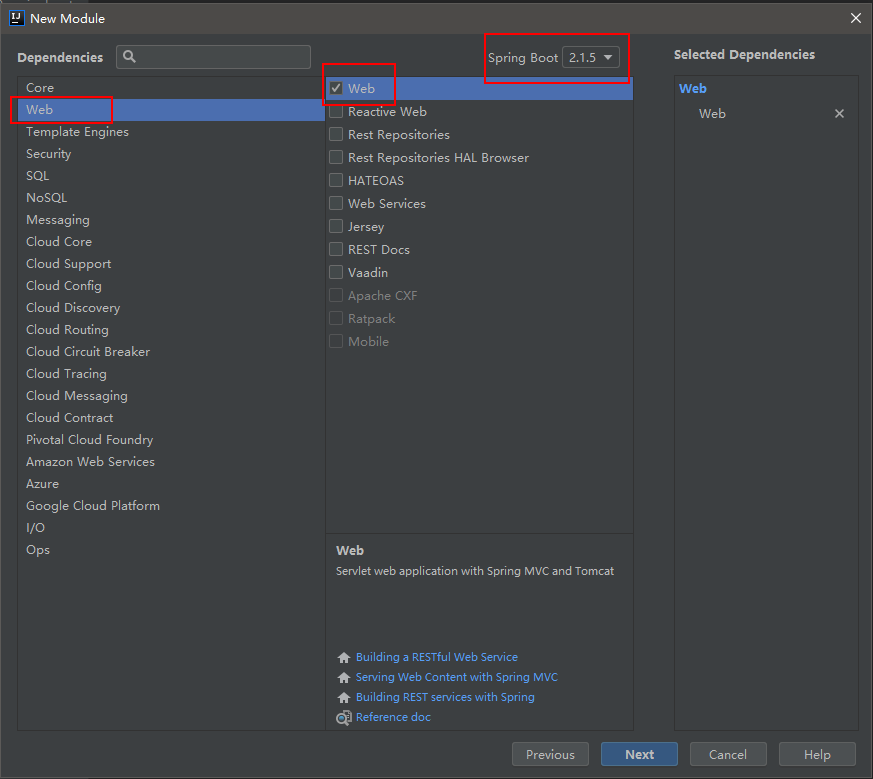
选择SpringBoot版本以及web依赖
修改Content root以及Mudule file location

3.在pom.xml中添加相关jar依赖
<!--MyBatis整合SpringBoot的起步依赖-->
<dependency>
    <groupId>org.mybatis.spring.boot</groupId>
    <artifactId>mybatis-spring-boot-starter</artifactId>
    <version>2.0.0</version>
</dependency>

<!--MySQL的驱动依赖-->
<dependency>
    <groupId>mysql</groupId>
    <artifactId>mysql-connector-java</artifactId>
</dependency>
4.在Springboot的核心配置文件application.properties中配置数据源
注意根据自己数据库的信息修改以下内容
#配置内嵌Tomcat端口号
server.port=9090

#配置项目上下文根
server.servlet.context-path=/010-springboot-web-mybatis

#配置数据库的连接信息
#注意这里的驱动类有变化
spring.datasource.driver-class-name=com.mysql.cj.jdbc.Driver
spring.datasource.url=jdbc:mysql://192.168.92.134:3306/springboot?useUnicode=true&characterEncoding=utf8&useSSL=false
spring.datasource.username=root
spring.datasource.password=123456
5.开发代码
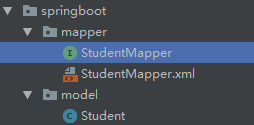
使用Mybatis反向工程生成接口、映射文件以及实体bean,具体步骤参见附录1
在com.bjpowernode.springboot.web包下创建StudentController并编写代码
/**
* ClassName:StudentController
* Package:com.bjpowernode.springboot.web
* Description:
*/
@Controller
public class StudentController {
@Autowired
private StudentService studentService;
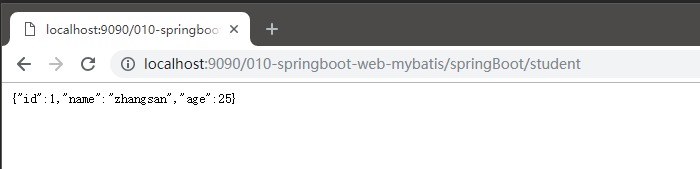
@RequestMapping(value = "/springBoot/student")
public @ResponseBody Object student() {
Student student = studentService.queryStudentById(1);
return student;
}
}
在com.bjpowernode.springboot.service包下创建service接口并编写代码
/**
 * ClassName:StudentService
 * Package:com.bjpowernode.springboot.service
 * Description:

 */
public interface StudentService {

    /**
     * 根据学生标识获取学生详情
     * @param id
     * @return
     */
    Student queryStudentById(Integer id);
}
在com.bjpowernode.springboot.service.impl包下创建service接口并编写代码
@Service
public class StudentServiceImpl implements StudentService {

    @Autowired
    private StudentMapper studentMapper;

    @Override
    public Student queryStudentById(Integer id) {
        return studentMapper.selectByPrimaryKey(id);
    }
}
如果在web中导入service存在报错,可以尝试进行如下配置解决

在Mybatis反向工程生成的StudentMapper接口上加一个Mapper注解
@Mapper作用:mybatis自动扫描数据持久层的映射文件及DAO接口的关系
@Mapper
public interface StudentMapper {
注意:默认情况下,Mybatis的xml映射文件不会编译到target的class目录下,所以我们需要在pom.xml文件中配置resource
<resources>
    <resource>
        <directory>src/main/java</directory>
        <includes>
            <include>**/*.xml</include>
        </includes>
    </resource>
</resources>
6.启动Application应用,浏览器访问测试运行
DAO其它开发方式
1.在运行的主类上添加注解包扫描@MapperScan("com.bjpowernode.springboot.mapper")
注释掉StudentMapper接口上的@Mapper注解

在运行主类Application上加@MapperScan("com.bjpowernode.springboot.mapper")

或

测试运行
2.将接口和映射文件分开
项目名称:011-springboot-web-mybatis
因为SpringBoot不能自动编译接口映射的xml文件,还需要手动在pom文件中指定,所以有的公司直接将映射文件直接放到resources目录下;
在resources目录下新建目录mapper存放映射文件,将StudentMapper.xml文件移到resources/mapper目录下;
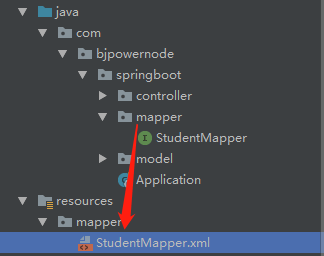
在application.properties配置文件中指定映射文件的位置,这个配置只有接口和映射文件不在同一个包的情况下,才需要指定
# 指定Mybatis映射文件的路径
mybatis.mapper-locations=classpath:mapper/*.xml