SpringBoot教程
SpringBoot入门案例
SpringBoot框架Web开发
- SpringBoot集成MyBatis
- SpringBoot事务管理
- SpringBoot中SpringMVC注解
- SpringBoot实现RESTful
- SpringBoot集成Redis
- SpringBoot集成Dubbo
- SpringBoot热部署插件
SpringBoot非web应用程序
SpringBoot使用拦截器
SpringBoot中使用Servlet
SpringBoot中使用Filter
SpringBoot项目配置字符编码
SpringBoot打包与部署
SpringBoot使用Actuator
SpringBoot集成Thymeleaf模板
- SpringBoot集成Thymeleaf
- SpringBoot Thymeleaf表达式
- SpringBoot Thymeleaf常见属性
- Thymeleaf字面量、字符串拼接及运算符
- Thymaleaf表达式基本对象与功能对象
SpringBoot总结及综合案例
SpringBoot工程下使用Mybatis反向工程
SpringBoot事务管理

SpringBoot 使用事务非常简单,底层依然采用的是Spring本身提供的事务管理
• 在入口类中使用注解 @EnableTransactionManagement 开启事务支持
• 在访问数据库的Service方法上添加注解 @Transactional 即可
案例思路
通过SpringBoot +MyBatis实现对数据库学生表的更新操作,在service层的方法中构建异常,查看事务是否生效;
项目名称:012-springboot-web-mybatis-transacation
该项目是在011的基础上添加新增方法,在新增方法中进行案例的演示。
实现步骤
1.在StudentController中添加更新学生的方法
@Controller
public class SpringBootController {

    @Autowired
    private StudentService studentService;

    @RequestMapping(value = "/springBoot/update")
    public @ResponseBody Object update() {
        Student student = new Student();
        student.setId(1);
        student.setName("Mark");
        student.setAge(100);

        int updateCount = studentService.update(student);

        return updateCount;
    }

}
2.在StudentService接口中添加更新学生方法
public interface StudentService {

    /**
     * 根据学生标识更新学生信息
     * @param student
     * @return
     */
    int update(Student student);
}
3.在StudentServiceImpl接口实现类中对更新学生方法进行实现,并构建一个异常,同时在该方法上加@Transactional注解
@Override
@Transactional //添加此注解说明该方法添加的事务管理
public int update(Student student) {

    int updateCount = studentMapper.updateByPrimaryKeySelective(student);

    System.out.println("更新结果:" + updateCount);

    //在此构造一个除数为0的异常,测试事务是否起作用
    int a = 10/0;

    return updateCount;
}
4.在Application类上加@EnableTransactionManagement开启事务支持
@EnableTransactionManagement可选,但是@Service必须添加事务才生效
@SpringBootApplication
@EnableTransactionManagement //SpringBoot开启事务的支持
public class Application {

    public static void main(String[] args) {
        SpringApplication.run(Application.class, args);
    }

}
5.启动Application,通过浏览器访问进行测试
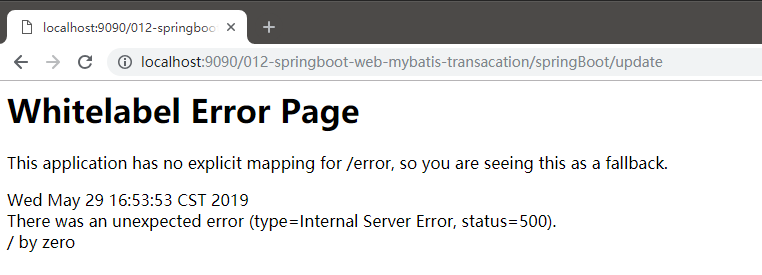
浏览器
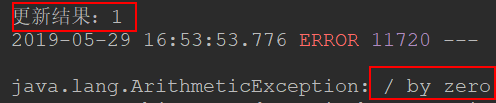
控制台
数据库表
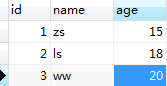
通过以上结果,说明事务起作用了。
6.注释掉StudentServiceImpl上的@Transactional测试
数据库的数据被更新