- SpringBoot集成MyBatis
- SpringBoot事务管理
- SpringBoot中SpringMVC注解
- SpringBoot实现RESTful
- SpringBoot集成Redis
- SpringBoot集成Dubbo
- SpringBoot热部署插件
- SpringBoot集成Thymeleaf
- SpringBoot Thymeleaf表达式
- SpringBoot Thymeleaf常见属性
- Thymeleaf字面量、字符串拼接及运算符
- Thymaleaf表达式基本对象与功能对象
SpringBoot Thymeleaf常见属性

大部分属性和html的一样,只不过前面加了一个th前缀。
项目名称:041-springboot-thymeleaf-property
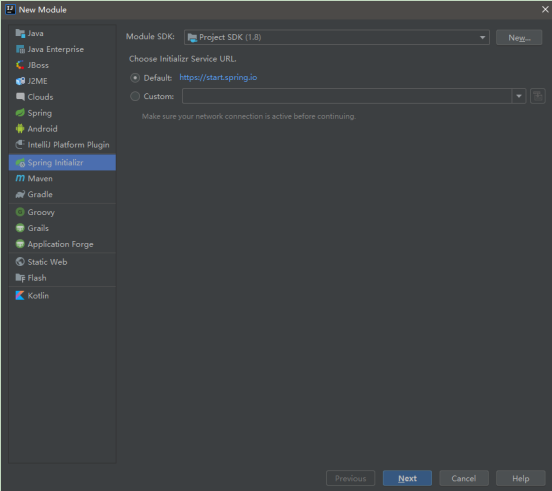
1.创建SpringBoot的web项目并使用模版引擎

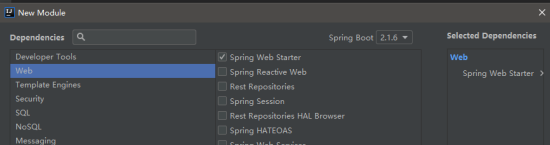

2.pom.xml中应该有如下两个依赖
<!--SpringBoot集成Thymeleaf模版引擎的起步依赖-->
<dependency>
    <groupId>org.springframework.boot</groupId>
    <artifactId>spring-boot-starter-thymeleaf</artifactId>
</dependency>

<!--SpringBoot的web项目起步依赖-->
<dependency>
    <groupId>org.springframework.boot</groupId>
    <artifactId>spring-boot-starter-web</artifactId>
</dependency>
3.在application.properties中设置thymeleaf参数
#设置thymeleaf页面缓存失效
spring.thymeleaf.cache=false

#thymeleaf模版前缀,默认值,可选项
spring.thymeleaf.prefix=classpath:/templates/
#thymeleaf模版后缀,默认值,可选项
spring.thymeleaf.suffix=.html
4.创建实体User实体类
在com.abc.springboot.model包下创建User实体类
package com.abc.springboot.model;
/**
 * ClassName:User
 * Package:com.abc.springboot.model
 * Description:

 */
public class User {

    private Integer id;

    private String nick;

    private String phone;

    private String address;

    //此处省略属性的set和get
}
5.创建ThymeleafController类
在com.abc.springboot.web包下创建ThymeleafController类
package com.abc.springboot.web;
import org.springframework.stereotype.Controller;
import org.springframework.ui.Model;
import org.springframework.web.bind.annotation.RequestMapping;
/**
* ClassName:ThymeleafController
* Package:com.abc.springboot.web
* Description:
*/
@Controller
public class ThymeleafController {
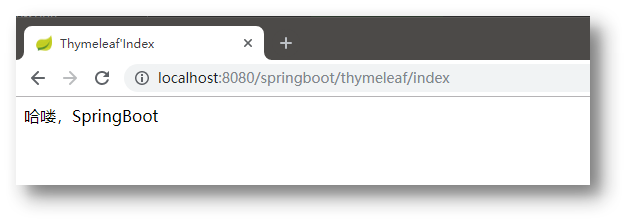
@RequestMapping(value = "/springboot/thymeleaf/index")
public String index(Model model) {
model.addAttribute("data","哈喽,SpringBoot");
return "index";
}
}
6.在src/main/resources/templates在创建html页面
<!DOCTYPE html>

<html lang="en" xmlns:th="http://www.thymeleaf.org">
<head>
    <meta charset="UTF-8">
    <title>Thymeleaf'Index</title>
</head>
<body>
<span th:text="${data}"></span>
</body>
</html>
7.测试
th:action
定义后台控制器的路径,类似标签的action属性,主要结合URL表达式,获取动态变量。
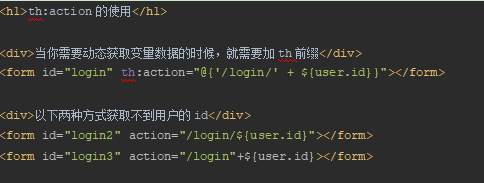
重新BuildModule,浏览器访问浏览器访问http://localhost:8080/08-springboot-thymeleaf/user ,右键查看源代码。
思考:为什么login3中${user.id} 获取不到数据?
因为我们Thymeleaf是以html为载体的,所以html不会认识${}语法。我们请求的流程是,发送请求给服务器,服务器接收请求后,处理请求,跳转到指定的静态html页面,在服务器端,Thymeleaf模板引擎会按照它的语法,对动态数据进行处理,所以如果要是th开头,模板引擎能够识别,会在服务器端进行处理,获取数据;如果没有以th开头,那么Thymeleaf模板引擎不会处理,直接返回给客户端了。
th:method
设置请求方法
<form id="login" th:action="@{/login}" th:method="post">......</form>
th:href
定义超链接,主要结合URL表达式,获取动态变量
<h1>th:href使用</h1>

<a href="http://www.baidu.com">超链接百度</a><br/>
<a th:href="'http://www.baidu.com?id=' + ${user.id}">th:href链接</a>
th:src
用于外部资源引入,比如<script>标签的src属性,<img>标签的src属性,常与@{}表达式结合使用,在SpringBoot项目的静态资源都放到resources的static目录下放到static路径下的内容,写路径时不需要写上static
<h1>th:src使用</h1>

<script src="/static/js/jquery-1.7.2.min.js"></script>
<script th:src="@{/js/jquery-1.7.2.min.js}"></script>
<img th:src="@{/img/alipay.jpg}">
<script>
    $(function () {
        alert("=====");
    });
</script>
这种方式比传统方式的好处是,在URL表达式前加/,会自动加上上下文根,避免404找不到资源的情况。
th:id
类似html标签中的id属性
<span th:id="${hello}">aaa</span>
th:name
设置名称
<input th:type="text" th:id="userName" th:name="userName">
th:value
类似html标签中的value属性,能对某元素的value属性进行赋值
<input type="hidden" id="userId" name="userId" th:value="${userId}">
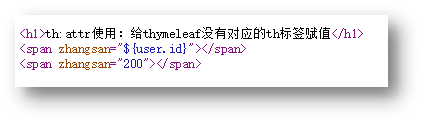
th:attr
该属性也是用于给HTML中某元素的某属性赋值,但该方式写法不够优雅;
比如上面的例子可以写成如下形式
<input type="hidden" id="userId" name="userId" th:attr="value=${userId}" >
好处是可以给html中没有定义的属性动态的赋值
<!--thymeleaf没有对应的th标签,所以${user.id}不能被识别-->
<span zhangsan=${user.id}></span>
<!--通过th:attr对自定义的属性赋值-->
<span th:attr="zhangsan=${user.id}"></span>
th:text
用于文本的显示,该属性显示的文本在标签体中,如果是文本框,数据会在文本框外显示,要想显示在文本框内,使用th:value
<input type="text" id="realName" name="reaName" th:text="${realName}">
th:object
用于数据对象绑定
通常用于选择变量表达式(星号表达式)
th:onclick
点击事件,th:onclick="'getCollect()'"
th:style
设置样式
<a th:onclick="'fun1('+${user.id}+')'" th:style="'color:red'">点击我</a>
th:each
这个属性非常常用,比如从后台传来一个对象集合那么就可以使用此属性遍历输出,它与JSTL中的类似,此属性既可以循环遍历集合,也可以循环遍历数组及Map
1.遍历List集合
在ThymeleafController中添加eachList方法,准备集合数据
@RequestMapping("/each/list")
public String eachList(Model model){
    List<User> userList = new ArrayList<User>();

    for (int i = 0;i < 10;i++){
        User user = new User();
        user.setId(100 + i);
        user.setNick("张" + i);
        user.setPhone("1361234567" + i);
        user.setAddress("北京市大兴区" + i);
        userList.add(user);
    }
    model.addAttribute("userList",userList);

    return "each";
}
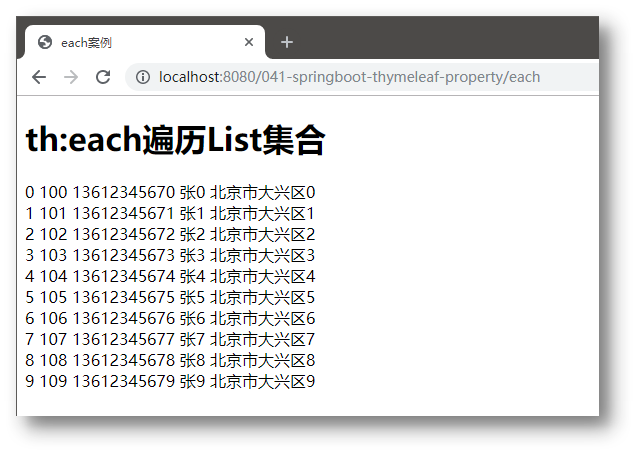
创建each.html对List集合进行遍历
<h1>th:each遍历List集合</h1>

<div th:each="user,userStat:${userList}">
    <span th:text="${userStat.index}"></span>
    <span th:text="${user.id}"></span>
    <span th:text="${user.phone}"></span>
    <span th:text="${user.nick}"></span>
    <span th:text="${user.address}"></span><br/>
</div>
代码说明
th:each="user, iterStat : ${userlist}"中的 ${userList} 是后台传过来的集合
• user
定义变量,去接收遍历${userList}集合中的一个数据
• iterStat
${userList} 循环体的信息
• 其中user及iterStat自己可以随便取名
• interStat是循环体的信息,通过该变量可以获取如下信息
index: 当前迭代对象的index(从0开始计算)
count: 当前迭代对象的个数(从1开始计算)这两个用的较多
size: 被迭代对象的大小
current: 当前迭代变量
even/odd: 布尔值,当前循环是否是偶数/奇数(从0开始计算)
first: 布尔值,当前循环是否是第一个
last: 布尔值,当前循环是否是最后一个
注意:循环体信息interStat也可以不定义,则默认采用迭代变量加上Stat后缀,即userStat
• 浏览器访问测试
2.遍历Map集合
在ThymeleafController中的each方法中准备Map集合数据
@RequestMapping(value = "/each/map")
public String eachMap(Model model) {

    Map<Integer,Object> userMap = new HashMap<Integer, Object>();

    for (int i = 0;i < 10;i++){
        User user = new User();
        user.setId(100+i);
        user.setNick("张" + i);
        user.setPhone("1370000000" + i);
        user.setAddress("北京市大兴区" + i);

        userMap.put(i,user);
    }
    model.addAttribute("userMap",userMap);

    return "each";
}
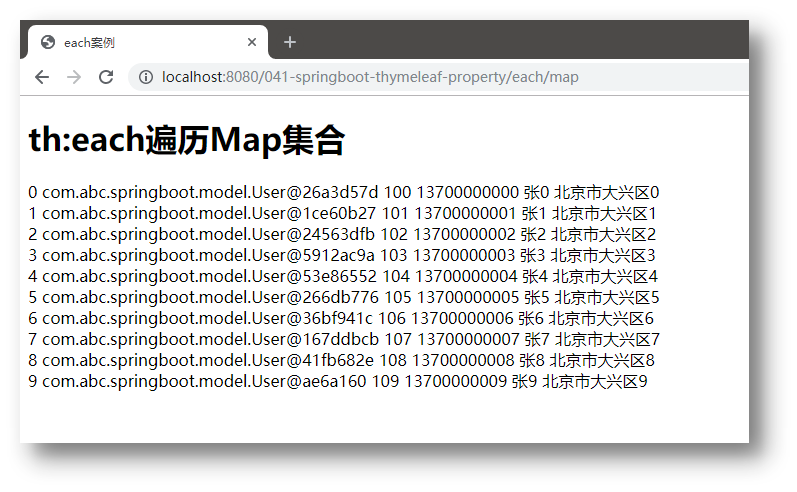
在each.html页面对Map集合进行遍历
<h1>th:each遍历Map集合</h1>

<div th:each="map:${userMap}">
    <span th:text="${map.key}"></span>
    <span th:text="${map.value}"></span>
    <span th:text="${map.value.id}"></span>
    <span th:text="${map.value.phone}"></span>
    <span th:text="${map.value.nick}"></span>
    <span th:text="${map.value.address}"></span>
</div>
代码说明
th:each="map:${userMap}"
用map接收每次遍历的结果,封装为一个键值对map.key获取当前键值对中的key map.value获取当前键值对中的value
浏览器访问测试
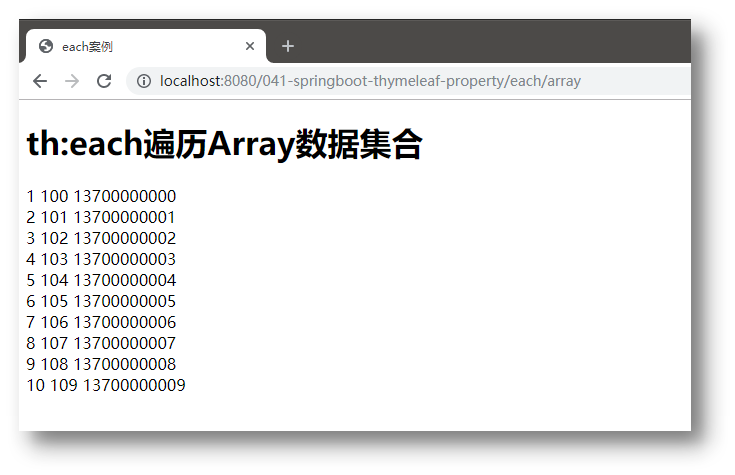
3.遍历Array数组
在ThymeleafController中的eachArray方法中准备数组数据
@RequestMapping(value = "/each/array")
public String eachArray(Model model) {

    User[] userArray = new User[10];

    for (int i = 0;i < 10;i++){
        User user = new User();
        user.setId(100+i);
        user.setNick("张" + i);
        user.setPhone("1370000000" + i);
        user.setAddress("北京市大兴区" + i);

        userArray[i]=user;

    }
    model.addAttribute("userArray",userArray);

    return "each";
}
在each.html页面对数组进行遍历(和List一样)
<h1>th:each遍历Array数据集合</h1>

<div th:each="user,userStat:${userArray}">
    <span th:text="${userStat.count}"></span>
    <span th:text="${user.id}"></span>
    <span th:text="${user.phone}"></span>
    <span th:text="${user.nick}"></span>
    <span th:text="${user.address}"></span>
</div>
浏览器访问测试
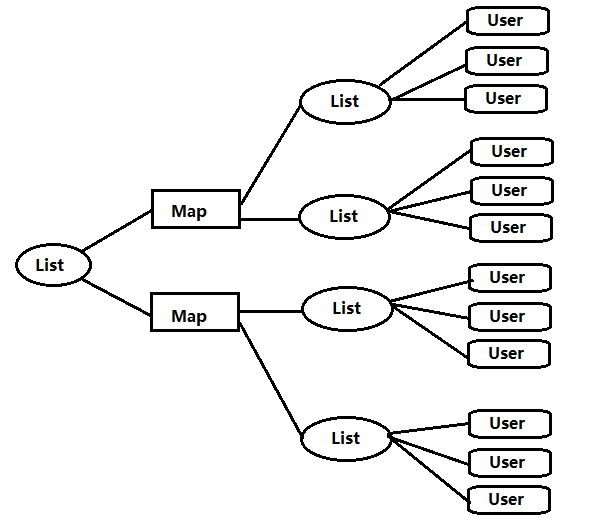
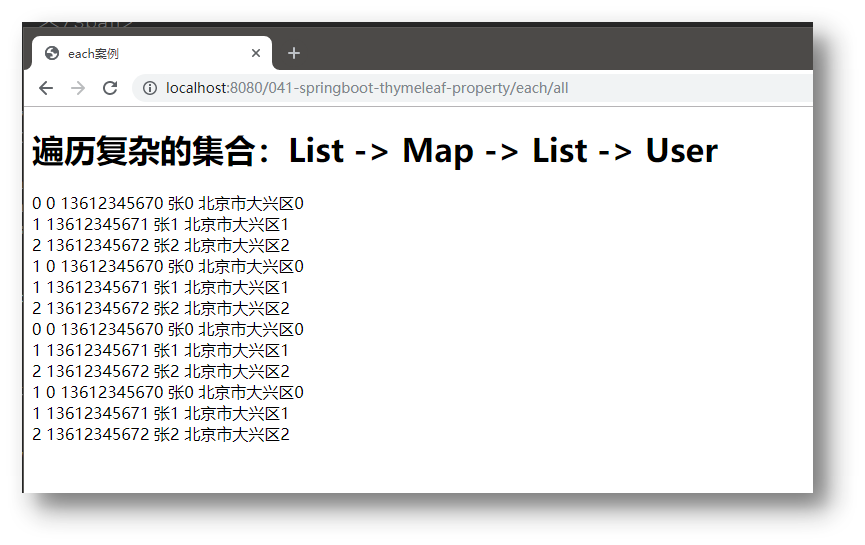
4.比较复杂的循环案例
需求:List里面放Map,Map里面又放的是List
在ThymeleafController的each方法中构造数据
@RequestMapping(value = "/each/all")
public String all(Model model) {

    //构造复杂的数据关系  List->Map->List->User
    List<Map<Integer,List<User>>> myList = new ArrayList<Map<Integer,List<User>>>();

    for(int n = 0 ; n < 2;n ++){
        Map<Integer,List<User>> myMap = new HashMap<Integer,List<User>>();
        for(int m = 0 ;m < 2; m ++){
            List<User> myList1 = new ArrayList<User>();
            for(int i = 0 ;i < 3; i++){
                User user = new User();
                user.setId(i);
                user.setNick("张" + i);
                user.setPhone("1361234567" + i);
                user.setAddress("北京市大兴区" + i);
                myList1.add(user);
            }
            myMap.put(m,myList1);
        }
        myList.add(myMap);
    }
    model.addAttribute("myList",myList);

    return "each";
}
在each.html页面对复杂集合关系进行遍历
<h1>遍历复杂的集合:List -> Map -> List -> User</h1>

<!--首先遍历List,获取Map-->
<span th:each="myMap,listStat:${myList}">

    <!--再次遍历Map,获取List-->
    <span th:each="myKeyValue:${myMap}">
        <!--获取当前Map集合的Id-->
        <span th:text="${myKeyValue.key}"></span>
        <span th:each="user,listSate:${myKeyValue.value}">
            <span th:text="${user.id}"></span>
            <span th:text="${user.phone}"></span>
            <span th:text="${user.nick}"></span>
            <span th:text="${user.address}"></span>
            <br/>
        </span>
    </span>
</span>
浏览器访问测试
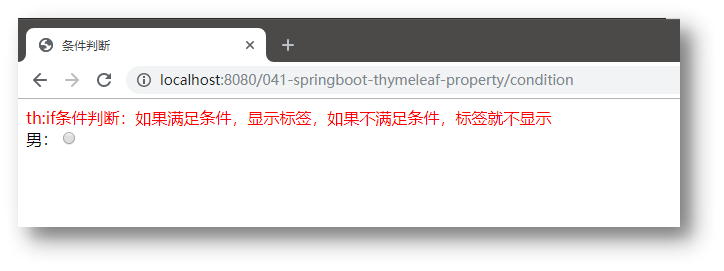
5.条件判断
向ThymeleafController中添加condition方法中,通过model传递sex值为1
@RequestMapping(value = "/condition")

public String condition(Model model) {
    model.addAttribute("sex",1);
    return "condition";
}
创建condition.html页面
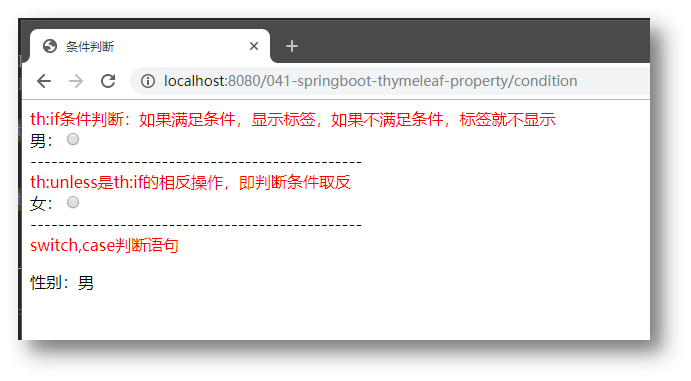
① th:if
在condition.html页面进行条件判断
<div style="color: red">th:if条件判断:如果满足条件,显示标签,如果不满足条件,标签就不显示</div>
<!--th:if条件判断:如果满足条件,显示标签,如果不满足条件,标签就不显示-->
<span th:if="${sex == 1}">
    男:<input type="radio" name="sex" th:value="男"/>
</span>
<span th:if="${sex == 2}">
    女:<input type="radio" name="sex" th:value="女"/>
</span>
② th:unless(了解)
th:unless是th:if的一个相反操作
<!--th:unless是th:if的相反操作,即对判断条件取反,一般我们用th:if-->

<span th:unless="${sex == 1}">
    男:<input type="radio" name="sex" th:value="男"/>
</span>
<span th:unless="${sex == 2}">
    女:<input type="radio" name="sex" th:value="女"/>
</span>
③ th:switch/th:case
switch,case判断语句
<div th:switch="${sex}">
    <p th:case="1">性别:男</p>
    <p th:case="2">性别:女</p>
    <p th:case="*">性别:未知</p>
</div>
一旦某个case判断值为true,剩余的case则都当做false,“*”表示默认的case,前面的case都不匹配时候,执行默认的case
④ 浏览器访问测试
th:inline
th:inline 有三个取值类型 (text, javascript 和 none)
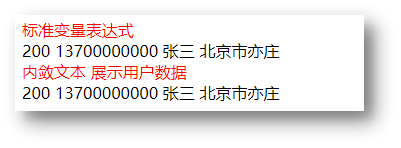
1.内敛文本(th:inline=”text”)
可以让Thymeleaf表达式不依赖于html标签,直接使用内敛表达式[[表达式]]即可获取动态数据,要求在父级标签上加th:inline = “text”属性
在user.html页面上,加如下代码
!--内敛文本-->

标准变量表达式用户数据的展示:<br>
<span th:text="${user.id}"></span>
<span th:text="${user.nick}"></span>
<span th:text="${user.phone}"></span>
<span th:text="${user.address}"></span>
<br>
<!--以上代码可以使用内敛文本代替-->
内敛表达式 用户数据的展示:<br>
<span th:inline="text">
    [[${user.id}]]
    [[${user.nick}]]
    [[${user.phone}]]
    [[${user.address}]]
</span>
<br>
浏览器访问测试
注意:一般我们将放到标签中
2.内敛脚本(th:inline=”javascript”)
在js代码中获取后台的动态数据
在user.html页面上,加如下代码
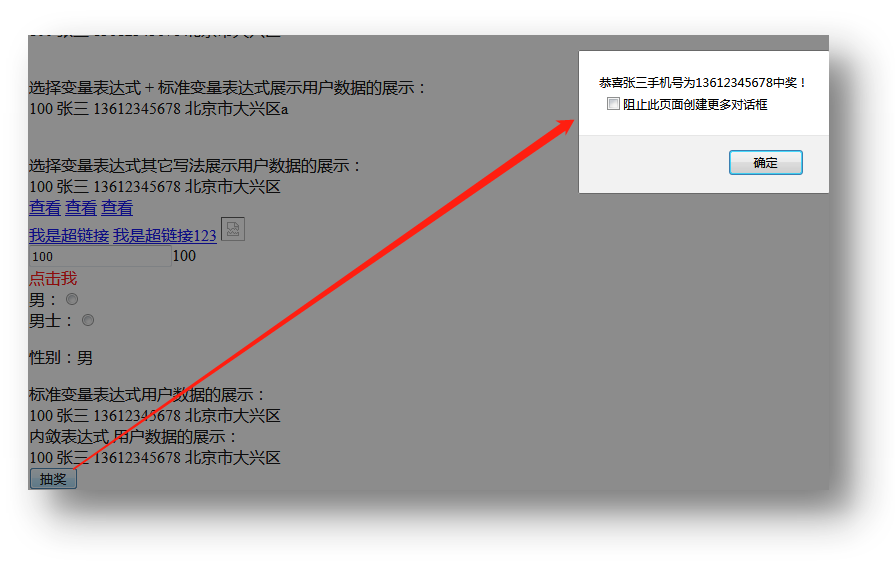
<button type ="button" onclick="func()">抽奖</button>

<script type="text/javascript" th:inline="javascript">
    function func(){
        alert("恭喜" + [[${user.nick}]] +"手机号为"+[[${user.phone}]]+"中奖!");
    }
</script>
浏览器访问测试